

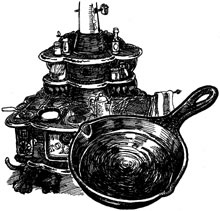
Venison and Mushrooms in an Iron skillet
 ©Dean Torges/The Bowyer's Edge™
Iron skillets are ideal for cooking tender cuts of large game because they permit high heat without warping or losing their non-stick coating. Because of their mass, they do not lose temperature rapidly like steel or aluminum skillets do when you introduce them to a steak. The virtue of high heat is that it sears meat and keeps juices inside, a highly desirable feature in game meat that by its nature can dry out easily during cooking.
Iron skillets and wood-burning cook stoves came to their Golden Age together, and not coincidentally. They were symbiotic companions, and their bond was a lard-based cooking and baking cuisine in America (which, incidentally, contributed greatly to the virtual disappearance of the black bear, and his precious cargo of cooking fat, from large portions of the Eastern half of our country by the turn of this century). The ring around the bottom of old skillets was there to center them snugly into the fire eyes of old-timey wood cook stoves. Different sizes of skillets mated to corresponding sizes of stove top eyes. Sometimes they were coded with Arabic numerals cast into the skillet handle or bottom and usually marked upon the eye's removable lid or nearby on the stove top.
A non-stick finish became a consequence of skillet use. After cooking, a skillet was wiped clean, maybe sometimes with a little heated water, as required to loosen foodstuffs, sometimes lightly greased, and then set back over the eye of the stove to sterilize and dry out, where it often remained in place of the stove lid. Through this routine, grease soaked into and filled the pores of the cast iron as it alternately warmed and cooled upon dying embers or over new kindling in the fire box. Remnant grease cooked onto the surface and built up something of an organic Teflon coating. Though this coating proves vulnerable to the modern house-keeping ethos of shiny pots and dishwasher kitchens, such routine treatment once maintained its stick-free condition, almost as an afterthought, through the course of daily use.
Today's iron skillets are no longer cast with these rings because they now sit flat upon gas and electric stove eyes. And most iron skillets are in sorrowful shape, even old black ones that have been in kitchen use for a while, their bare iron cooking surfaces imparting a metallic taste to food, because we do not ritually renew their coating after use. When we finish cooking, we finish heating—we turn off the stove's burners and there's no residual heat to do the job on skillets. So, to keep an iron skillet seasoned in a modern kitchen, you have to go out of your way a little bit.
If you purchase a new skillet, simply follow the seasoning directions that come with it. Most of us have an old black skillet that sticks, either hidden in the kitchen or carried to the basement. To revive it, follow this quick-seasoning procedure, and in half an hour or less you will be ready to sear steaks.
If the skillet has cooking oil on it, wash it with warm soapy water. Never again rub it with oil; never again subject it to soapy water. Dry the skillet and rub a thin film of Crisco vegetable shortening, or tallow, or lard (such as bacon grease or rendered bear fat) over the bottom with a crumpled section of waxed paper or paper towel. Turn the burner to medium heat. Within 10 minutes, the film of grease will dry up and coat the bottom. After it dries, repeat the process. Do it several more times: lay in a thin coat of grease in the hot skillet bottom, wait til it hardens, then lay in another. It will smoke slightly upon application, but soon you will have created a slick, moisture resistant, hardened film of grease. Done, you are ready to fry your steaks.
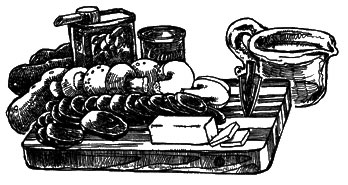
Have ready:
- Enough deboned, butterflied venison loin medallions to cover the skillet bottom twice, sliced thin and close to room temperature so they do not rob the skillet of heat.
- 16 ounces of fresh mushrooms, rinsed, drained, dried and sliced, over which you have dribbled a little olive oil.
- 1/2 cup dry white wine, or 1/2 cup of water with a bouillon cube, or 1/2 can of consommé.
 Bring the skillet to medium high temperature and then add any combination of three tablespoons of olive oil and butter, usually about half and half. Turn the skillet temperature up some more and introduce the medallions. Push them around a little so they catch all the skillet heat and do not stick. If they lose juices, the skillet is not hot enough. In less than a minute, they should be ready to turn. Within a minute of turning, remove them to a warming dish. They should be nicely seared on both sides. Add sufficient butter and olive oil to grease the bottom and cook the second skillet full. (Butter mixed with oil will not burn at such high temperatures, but work quickly to place meat in the skillet or the butter will burn.)
As soon as the second batch is removed and while the skillet is still on hot, add the mushrooms. You have to work quickly to avoid burning the coating off the skillet. Settle them with a shake or two of the skillet (you will need a pot holder, or the skillet is not hot enough). Leave them sit without stirring. Dribble or spritz a little more olive oil over them immediately before they need to be turned. Too much and they will not brown. If the skillet is not hot enough, or if you stir them too much, they will lose their water and simmer in it.
When they have thoroughly turned color, remove the skillet from heat and cover the medallions with the mushrooms. Let the skillet cool off for a minute. It has "leavings" glazed over its cooking surface. Pour in the wine or the broth to deglaze, gently working the skillet bottom with a wooden spatula while you return it to medium heat. As soon as the "leavings" loosen and dissolve and the liquid comes to a boil, pour everything over the mushrooms and medallions.
Seems to me that mashed potatoes are universally disregarded by refined culinary palates. I can't imagine the Frugal Gourmet rapturing over such common food. He never ate mashed potatoes with venison medallions in their own juice covered with mushrooms, obviously. And you won't find black cast iron skillets hanging from his kitchen ceiling, either. Too bad for him. Serve up some mash'taters with your butterflied loins, and spoon some hot, thin, rich, brown juice over them, too.
If you are lucky enough to prepare this meal in the spring and can substitute sliced morels for their pallid grocery store cousins, you will arrive as close to heaven as plain men get in this world. Of course, this means that fresh spinach is in season, too, for a side dish. Buy some from the market if you don't garden, and while there purchase a few small zuchinnis and some frozen baby green peas or fresh edible pod snow peas. Slice up the zuchinni, add a few tablespoons of water to a lidded pot and steam the whole green mixture until tender. Salt, squeeze on half a fresh lemon and add some virgin olive oil.
One more tip. Sometimes loin is tougher than you might wish. Or sometimes you eat it all and look next to use some choice cuts from high up on the haunch this way, too. If you butchered and froze your split-hooved meat (except for any kind of pork) soon after killing it, you can leave a thawed cut in a cold refrigerator, trimmed, for a week to ten days and it will age properly, coming to a delectable, unspoiled tenderness.
Don't forget to wipe clean and regrease your skillet when you are done eating. You will want to be ready to go somewhere like this again, soon.
